Repotting a plant is a momentous occasion. If you’ve grown it from seed, it validates your ability and effort; if you bring it home pre-potted, it’s a statement of care. For experienced gardeners, repotting a long-loved houseplant can evoke memories. Repotting is a skill that you may not get to practice often, and the price of making a mistake may be plant you adore. So let’s begin learning how to repot plants.
Why do Plants Need Repotting?
The most common reason for repotting a plant is because the plant has outgrown its current one. But there are other reasons to repot as well. You may be taking a plant out of its container to remove compacted dirt that is interfering with water absorption. If you have a hard water supply, or if you use liquid fertilizer, your pots may develop an unsightly mineral buildup that you want to scrub away. Or you want to replace nutrient-exhausted soil with soil that is fresh, fertilizer-rich.
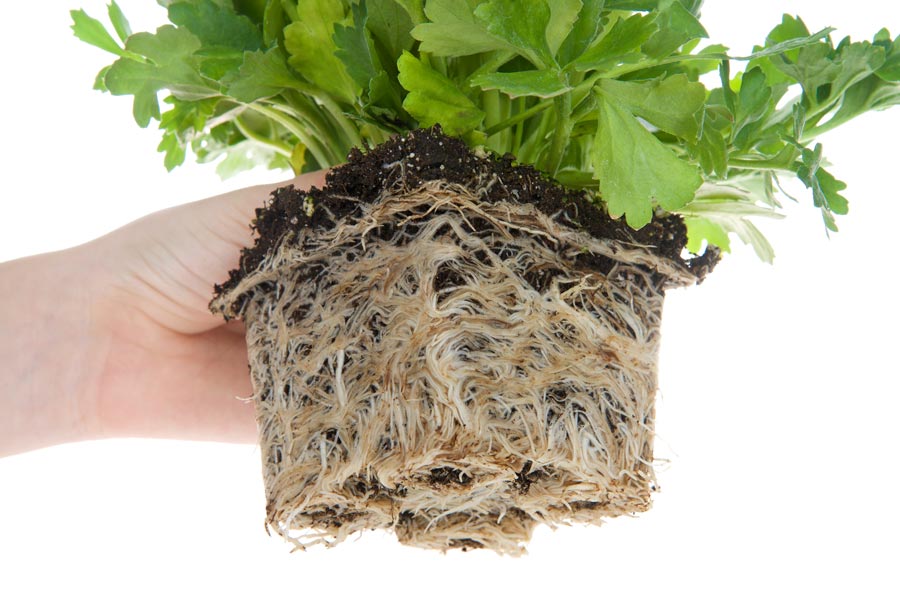
Brand new plants often need repotting most of all! Nurseries use small pots to minimize costs and make transportation easier. But that means your new plant’s roots may have been circling inside that container for weeks.
How do You Repot a Plant?
Before you take your plant from its old home, water it thoroughly. While your plant gets a final soak before its big move, prepare your new pot. Don’t skip this step, as a well-hydrated plant is much better prepared to resist the stress of being transplanted.
The new pot should be an inch or two (~5cm) larger than the current one. Can you go larger? Sure, but a larger pot may dwarf your plant. You want eyes drawn to the blossoms, not an expanse of dirt! You are also increasing the risk of root rot, as water will collect in the excess soil.
If you are reusing a pot, clean it first to avoid transferring fungi, salt deposits, or soil-borne bacteria. It should go without saying that any cleanser you use should be non-toxic. If you are in the right climate, a day drying in the sun’s ultraviolet radiation light can help.
When the pot is ready, add some of your new growing medium to the bottom. Create a layer deep enough to give the roots room to grow after the transplant. Depending on the size of the pot’s drainage hole relative to the coarseness of your growing medium, you may find dirt spilling through.. Gardeners often solve this issue by placing a coffee filter, shard of broken pot, or a few stones at the bottom. You might also dice up an old window screen and make yourself a lifetime supply of soil catchers!
Filling the New Pot
You want to choose a growing medium that makes it easy for new roots to grow. These roots aren’t the vigorous spurts of a young shoot; these are tentatively re-starting growth after being root-bound and malnourished. Typical garden soil or potting soil is too dense for new roots from a tired plant to push through. To help your plant settle into its home, you need to use the right potting mix.
Potting mix is much lighter than both potting soil and outdoor garden soil. It has light materials added, such as sphagnum moss, vermiculite or peat. These materials create minute pockets of space where air can reach new roots. There is a wide range of mixes out there, and it’s worth knowing what each ingredient is useful for.
Some plants have special requirements that you should be aware of. For instance, succulents, cacti, and citrus plants need a medium with excellent drainage. Some flowers, on the other hand, need to stay more moist. Match your plant’s needs to the right type of potting mix.
Leaving the Old Pot Behind
Now that the new pot is ready, it’s time to separate your plant from its old one. Depending on the size of your plant, and how root-bound it is, separation may be a struggle or a breeze. If the plant is a manageable size, turn it on its side. If the pot is flexible (such as a fabric grow bag or soft plastics), give the sides a few gentle thumps with your hand. Run a trowel or similar flat tool around the edges to loosen the root ball.
Don’t pull to lift the plant out. Your plant is already stressed enough, and you may tear it. Instead, tilt the pot halfway upside down and shake the plant into your hand or onto your potting table. Use your trowel to pry as needed. Be patient.
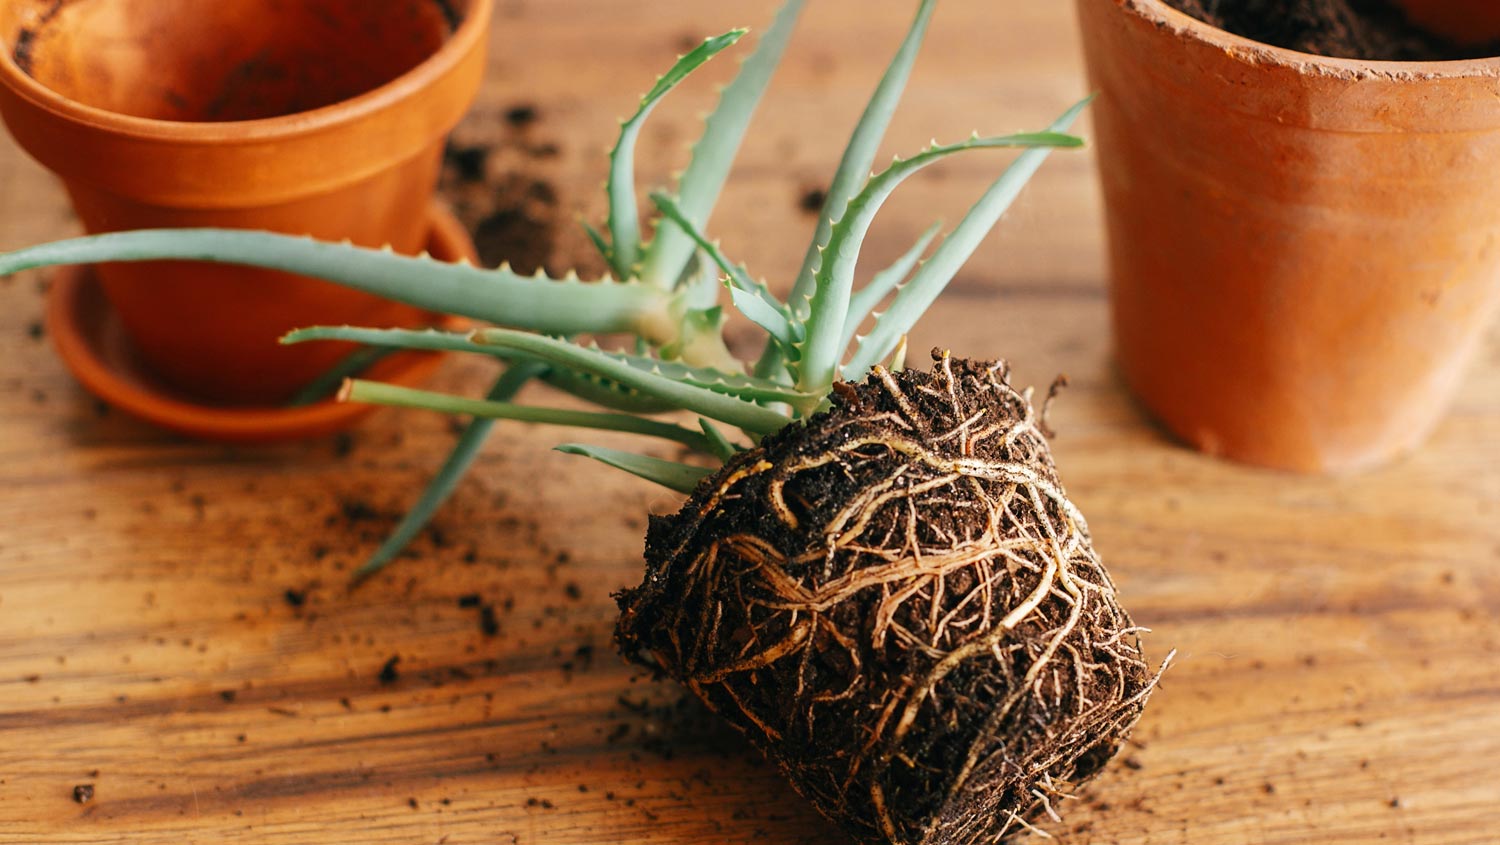
Once you have the plant exposed, it’s time for some root care. Untangle the main rootways from one another and shake loose impacted dirt. Do this by pushing your fingers into the root ball and spreading the roots apart. You may hear and feel some tearing, but don’t worry — as long as you are not reckless, the roots can take it.
Cut away any roots that are dark or soft, as well as any circling entirely around the rootball. If your plant produces rhizomes (such as ferns, bamboo, irises, and ginger) you can cut some away and propagate new plants.
To help plants with new root growth, you can cut into the outer layer of roots. With a clean, sharp tool, cut vertically about ½ inch (~2cm) deep around the rootball. Repeat every few inches. These cuts will discourage the roots from horizontally encircling the rootball, and provide a place for new roots to grow from.
Settling into the New Pot
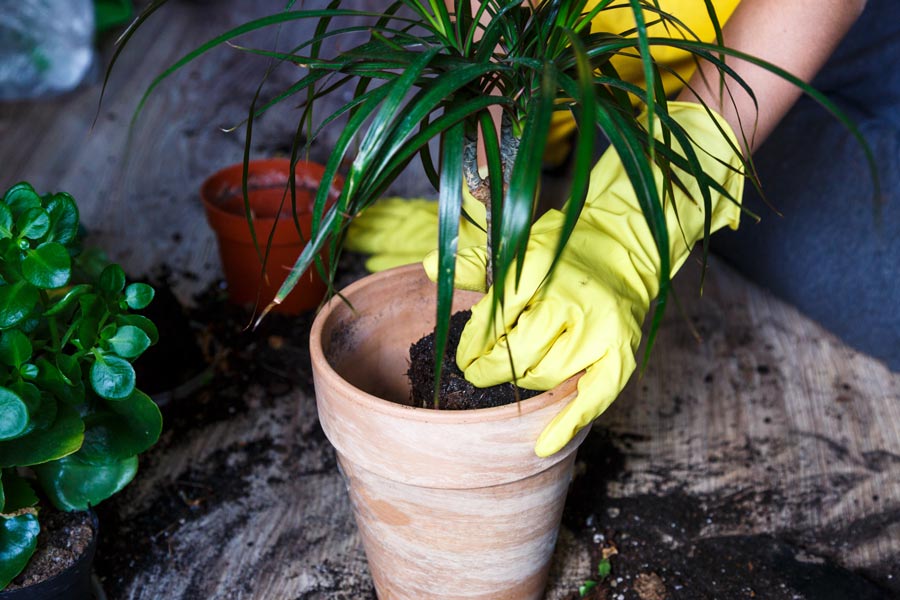
Place your plant in the center of the dirt layer you previously prepared. Fill in the edges evenly. It is helpful to rotate the pot as you fill it so that the plant sits evenly in the center. Cover the plant at the same relative depth — that is, don’t cover what was exposed in the old container, and don’t leave previously covered parts of the plant exposed. Gently pat down the potting soil. Don’t overpack — new roots need loose, airy soil to grow.
Finish by giving the plant and surrounding earth a good soak. This will settle the dirt and bring it close to the roots, ready to supply nutrients. Resist the temptation to push the dirt down more or fiddle with the angle of the main stem. Your plant has been through a lot and will welcome minimal attention for a week or two.
How Often Should I Repot my Plants?
Plants are often described as fast-growing or slow-growing. A fast-growing plant may need to be repotted twice a year, while a slow-growing plant might only need repotting every other year. Younger plants will need repotting more often. If you are concerned with keeping your houseplants healthy, you should learn to watch for symptoms that your plant needs more space. If you are growing crops from seed to sale, you should have a schedule of repotting that matches the growth stages of your plant.
For ornamental houseplants, the most obvious sign is that it is growing against the pot’s lip, or flopping over it like a tired dog’s tongue. Stunted growth, poor fruiting or flowering, and a lessened ability to retain water are other common signs. If you are using a pot with a drainage hole in the bottom, you may see roots poking out. In some cases, the roots may crowd the surface of the soil. The more of these symptoms your plant presents, the more it is in need of repotting.
Some crops, such as tender herbs and microgreens, will likely be harvested before repotting is needed. But for crops grown for their fruit or flower, plan on repotting your plants at regular intervals.
Whether growing from seed or cutting, the first repotting should occur soon after your plant establishes its first few nodes or branches. A 3 gallon (~10 liters) pot is typically a good size for plants while they develop their roots and develop foliage. Lettuce and many herbs will be at home at this size.
Once larger crops have a healthy root ball and desired leafy growth, it is time to repot again. You will want to move each plant into a 5-7 gallon pot. This additional space will let the roots and leaves grow large enough to gather energy to develop buds. For some crops, such as ornamental flowers and woody herbs (rosemary, oregano), this is the end of their repotting.
For fruit trees, and continuously fruiting plants (strawberries, tomatoes), a final repotting is worthwhile. Larger pots equal larger plants, and larger plants mean greater yields. Depending on your space and goals, a final pot up to 20 gallons may fit your needs. Also consider that as fruits develop, your plant will grow top-heavy. Repotting to a large pot will prevent your plant from tipping over.
When possible, repot during dormant times (before spring growth or after the last harvest). If you repot when the plant is putting energy into new leaves or flowers, it will have little energy for growing new roots.
To Pot or Not to Pot
There are reasons to forgo repotting. Perhaps you like the plant’s current size (bonsai, anyone?) Maybe the color combination of pot and leaf is too delightful to give up. While plant nurseries and commercial growers put a premium on growth, interior decorators and apartment dwellers may weigh their choices differently. If you are happy with the plant and pot the way they are, just be sure to feed it every six months or so with a quality fertilizer.
Repotting Large Plants
Sometimes a plant is too large to simply pop out of an old pot and into a new one. A cylinder of soil 15 inches in diameter and 15 inches deep can weigh as much as 200 pounds! If this is the case, you can keep it healthy by ‘redressing’ the soil. To do so, remove the top few inches of soil, and replace it with new, nutrient-rich soil. As you water it, nutrients will gradually seep down to the roots, where the plant can absorb them.
Houseplants tend to have a size limit, but if you are working with trees, bushes, or similar woody-stemmed plants, your final repotting is going to be outdoors. And to successfully move a plant from an indoor container to an outdoor space, we need to adjust our methods.
Going from Pot to Outdoor Soil
Whether you have a tomato plant ready to move to the garden bed, or you are bringing in azaleas to landscape a yard, a few additional details need your attention. Forget the 2-inch margin of extra width that we use for moving pot-to-pot. Plants moving from plot to soil need much more space.
The width of the hole must be 2 to 3 times the diameter of the root ball. This loosens the soil and allows you to add any fertilizer — both helpful to young roots. Fortunately, you need not be as industrious with the hole’s depth: it should be no deeper than the root ball. In fact, in order to avoid rot, and to mitigate compacted soil, many tree growers recommend making the hole a bit shallower than the root ball
How you refill the hole depends on what you are growing. If you are growing vegetables or annuals, it is common to cover the bottom with manure or a commercial fertilizer. This is a good way to ensure that you avoid potential nutrient deficiencies and grow a bountiful crop.
However, Monty Don, of BBC’s Gardeners World, has a different take on transplanting a nursery-grown tree that bears considering. He suggests not filling the bottom with a layer of nutrient-rich compost. He believes that giving the roots such easy access to nutrients gives them no reason to spread wide, which is needed for stability and long-term viability.
Conclusion
Understanding how and when to repot plants is a useful skill in any gardener’s repertoire. Whether it’s to give a favorite plant more room, ensure transplants their best chance to take root, or to maximize the output of your cash crop, it’s worth your time to do it right.